


Honeybook for Photographers – How to Get the Most Out of This CRM
We want to talk about Honeybook for photographers because we have many years of experience running wedding photography businesses using this CRM and feel it’s a great solution for creative service professionals and photographers in particular.
What is Honeybook?
Honeybook is a customer relationship manager (or CRM for short) that was designed for use by creative business owners.
With Honeybook, you will be able to take care of your clients and better manage your interactions with them from the first inquiry they submit to the last communication as you deliver their photo gallery.
While this sounds simple, there are a lot of great features that enhance this experience such as workflow automations and reporting. Let’s talk about all of the features you should know about as a Honeybook user!
The 13 Best Honeybook Features to Know About as a Photographer
As photographers, we want to highlight the parts of Honeybook we use regularly to run our businesses effectively.
1). Build a contact form in Honeybook
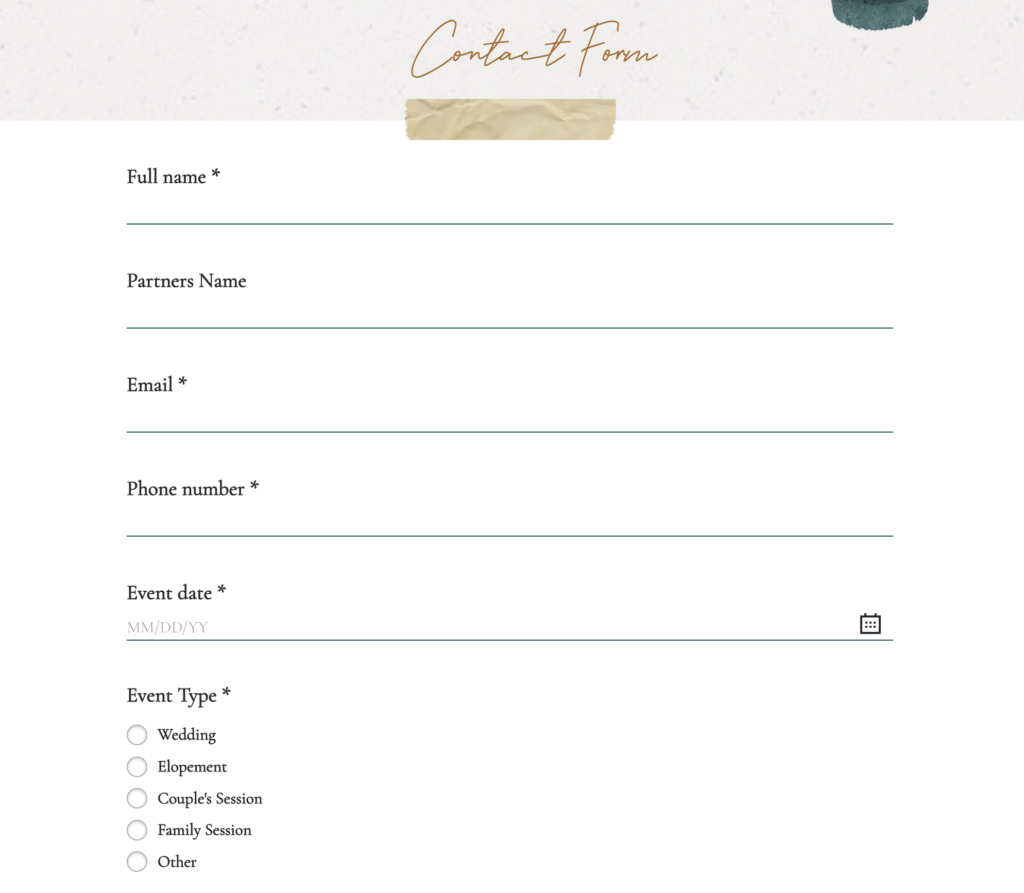
One of the starting points for most photographer workflows using Honeybook will be integrating their contact form onto your website.
By using this contact form, every inquiry you receive will populate into Honeybook when it’s submitted, and you can even create custom automated emails (more on that soon) to respond to these prospective clients.
You can also custom design this form to look good and ask for the info you want to collect.
As this form embeds onto your website, you can also design the rest of your website page around it to further enhance how it looks on your site.
2). Save email and contract templates
All of those emails you send again-and-again? You can now save them as easy to access templates.
The same goes with contracts, proposals, and invoices.
You can get access to a ton of great email templates if you join us in The Photography Business Academy!
3). Use the calendar

The calendar in Honeybook syncs with your projects (which typically come in with specific dates).
You can also sync it with other calendar apps like Google Calendar and Calendly so it is always up to date.
4). Make scheduling calls easier and more professional

Honeybook has a great call scheduler built in – so you don’t have to pay for outside service (like Calendly) if you don’t want too. The call scheduler allows you to send a link to clients who can then select a time to talk with you based on your customized availability parameters.
5). Review reports to see your sales
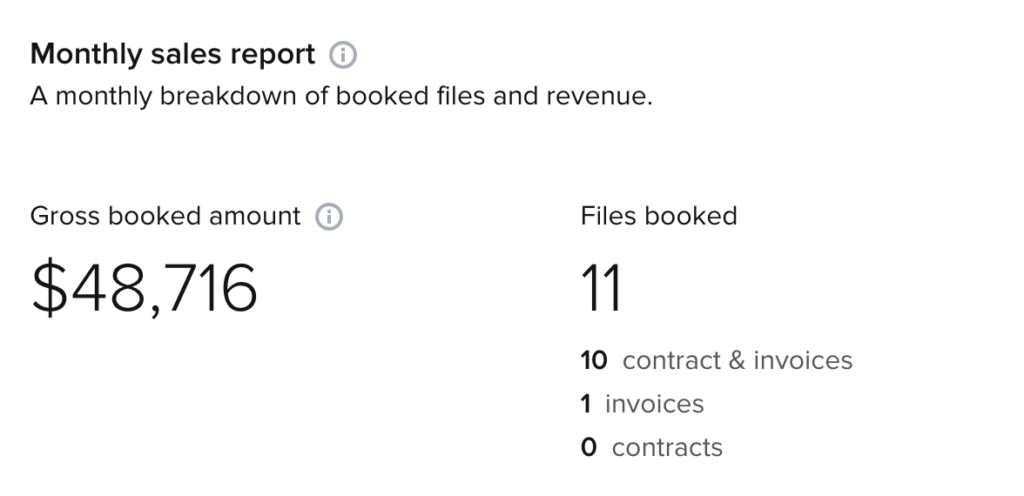
In the Reports section, you can view your sales breakdown and export this information into spreadsheets. We like reviewing this just to keep up with our sales, as well as making paying sales tax easy since all of the data is right there for us!
6). Build and automate your workflows
Workflows and automation are a key part of the Honeybook experience.
From simple things like automating an initial inquiry response email to building out a full workflow that makes sure you’re following up with your clients at preset times, there is a ton of potential to make your life easier.
7). Organize your clients into customizable workflow queues
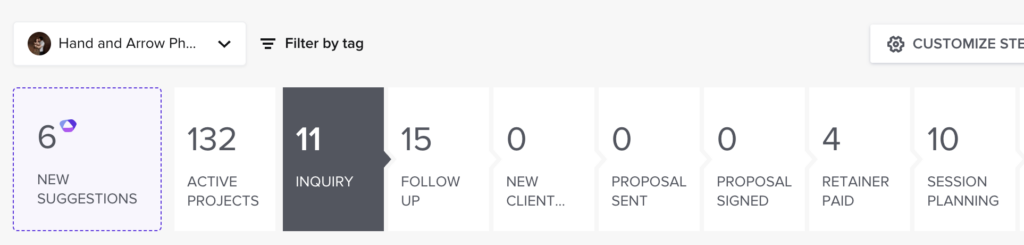
For visual people like ourselves (and we imagine a lot of photographers will be), being able to see a breakdown of your current clients by their position in your project “queue” makes it even easier to see the status of every client.
While these queues are customizable to your specific needs, here is how we laid ours out to work for our wedding photography businesses:
- Inquiry
- Follow Up
- Phone Consult
- Proposal Sent
- Proposal Signed
- Retainer Paid
- Session Planning
- Session Editing
- Session Complete
- Wedding Planning
- Wedding Editing
- Album Scheduling
- Album Scheduled
- Album Production
- Album Shipped
- Completed
- Archived
When signed into my Honeybook account, I am able to quickly see the status of all my projects and it can help with prioritization of the days tasks.
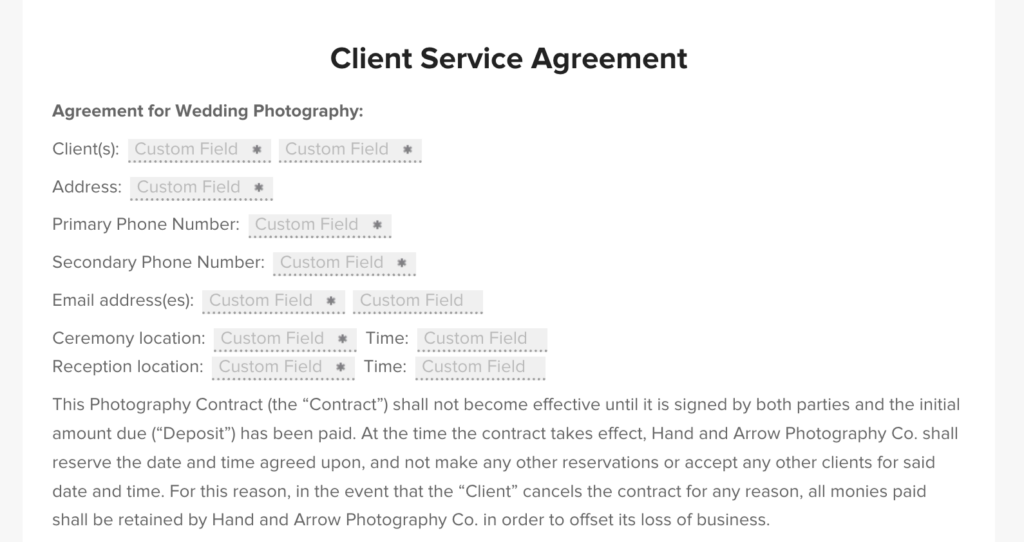
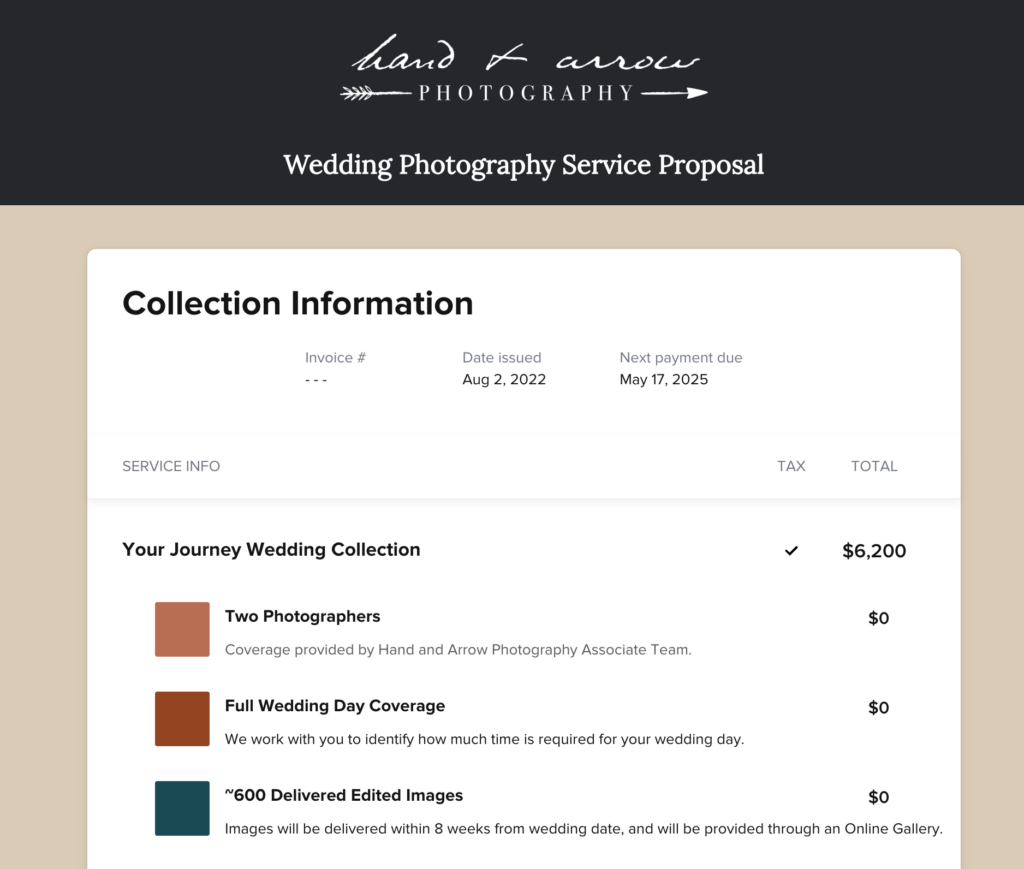
8). Send contracts and get paid all through Honeybook
One of the main uses of Honeybook for photographers will be to send photography contracts and get paid. As we mentioned, you can save all of your contract templates, then quickly send them out to clients who want to book you.
Getting paid is easy too! By integrating with Stripe, you can accept all major credit and debit cards, as well as bank transfer transactions.
Make it easy to get booked!
9). Sync emails from your regular email provider to HB
Using the email integration feature, you can easily connect your Honeybook account with your email provider (gmail, yahoo, etc.) so that you can send and receive emails (and have them sync in Honeybook) both through the HB platform as well as your regular email provider.
10). Create and send questionnaires to collect info from your clients
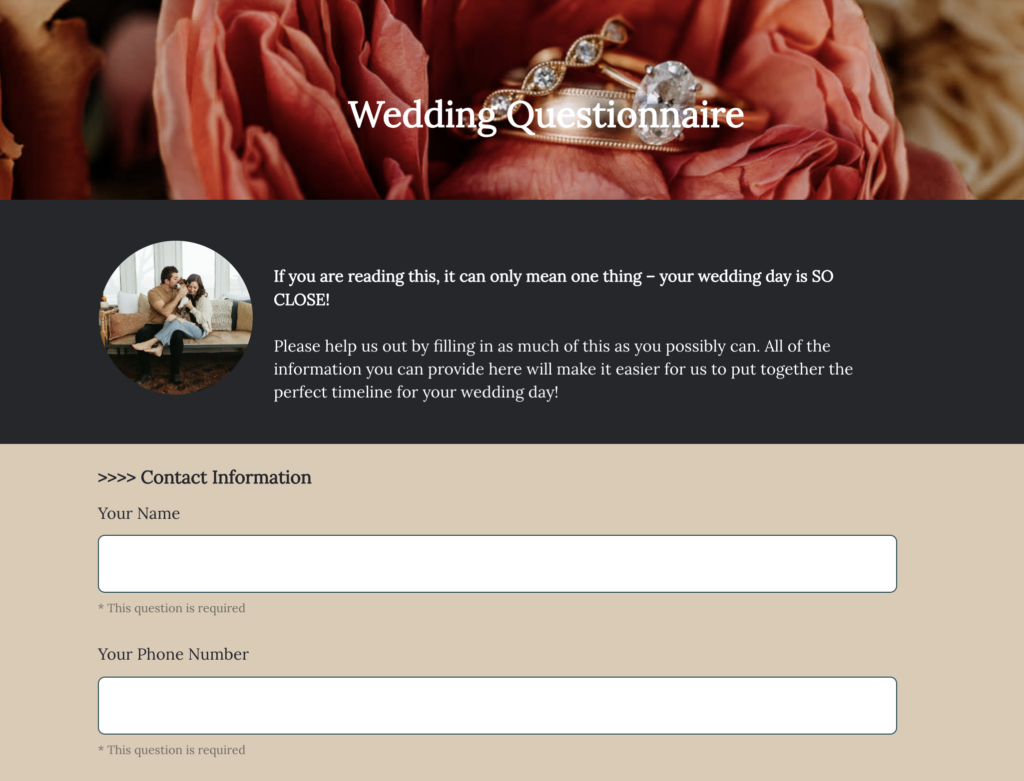
As wedding photographers, we always send a Wedding Questionnaire to our clients prior to their wedding to collect key info about their day. Using Honeybook, you can send this and have it associated with their project file for easy access.
Wedding questionnaires are included in our Client Experience for Photographers course if you need more help in this area!
11). Add team members to specific projects
For photography businesses expanding their team to have associates, 2nd shooters, album designers, and more – you can easily add these people as team members, and add them to specific projects.
For example, if you hired a 2nd shooter for Amy & Mike’s wedding – you can add them just to that project. They will be able to see all emails, files, and communicate with them as well with your oversight.
12). Give clients a portal to access all of their files and communications with you
You can provide your clients a link to a private portal that gives them access to all email communications, files, their contract and invoice schedule, and more. It’s a simple hub that makes it easier for them to keep up with everything associated with working with you.
13). Create pricing brochures using Smart Files
In 2022, Honeybook released a new feature called “Smart Files”. While there are a lot of different uses for these, one of our favorites is creating our Pricing Brochures to share with inquiring clients.
Want to get ahead of the competition? Sign up for Honeybook today using our link to receive 50% off your annual subscription.
How to Set Up Your Honeybook Account (For Photographers)
In this section, we’re going to give you a step-by-step guide to setting up your Honeybook account. It’s easy to get started!
Step #1: Sign up for Honeybook
When you sign up, you receive a free 30-day trial.
For users who sign up with our link, you will also receive 50% off your annual subscription if you choose to upgrade to a paid user.
Step #2: Fill out your basic account info
You’ll be asked to fill in:
- Your Name
- Job Title
- Email Address
- Phone Number
- Security Phone Number
Step #3: Set up 2-Step Verification (Optional)
Two factor authentication requires you to login with your email and password, then input a special code that is sent to you via a text message. This is the most secure way to manage your account.
Step #4: Add Payment Methods
You can add your credit/debit card to pay for your Honeybook subscription should you choose to stick with them as your CRM of choice.
Step #5: Customize your Company Brand
You can customize your company information, brand elements (such as logo and colors), smart file themes, email signature, info about your company, social media accounts like Instagram, etc.
This information will be used in different ways throughout Honeybook.
For example, by customizing your smart file themes, every time you create a new smart file – it will automatically apply things like your brand colors – saving you time.
Step #6: Preferences
In the preferences section, you will be able to edit certain data you collect about your projects, notifications you receive about projects, actions the platform can take (such as sending out payment reminders), and more.
Step #7: Domain & Client Portal
You can customize the login screen for the client portal and share the link to this with your clients.
As a reminder – the client portal is a location your client’s can go to, to access everything associated with their project including emails, questionnaires, contracts, upcoming payments, and more.
Step #8: Integrations
Honeybook can be integrated with a number of other services including:
- Email integration (gmail, yahoo, etc.)
- Quickbooks
- Zapier
- Facebook/Instagram lead ads
- Microsoft Chrome
- Zoom
- Calendly
- Pic-Time
Step #9: Team
You can add additional team members in this section, as well as set their access privileges.
Step #10: Bank Details
Finally, you’ll want to set up your bank information so you can receive the money from your bookings.
10 Tips for Creating Better Workflows in Honeybook for Photographers
Tip #1: Create templates for your popular packages
It’s likely that you already have go-to packages that you share with prospective clients. With Honeybook, you can create your packages as templates, so you can easily send out pricing information and get booked.
There are two templates types we’d like to highlight that we use for this purpose.
First – you can create pricing guide by using Smart Files. This is a file you send to a prospective client interested in learning more about your services and pricing information.
Second – you can create a Proposal, which includes the package information, contract and invoice schedule. This will be the file you send to a client who is ready to book with you.
Don’t have a contract yet? That’s okay! Check out our Recommended Contract Templates for Photographers.
Tip #2: Import and organize your email templates
Simply copy/paste your current email templates by going to Templates -> Emails -> Create a New Email.
Once you store your template in Honeybook, you will be able to pull it from a dropdown when responding to your clients.
Tip #3: Set up your contact form
The contact form is used to capture leads directly from your website. It will replace the form currently used by your website provider like Squarespace, Showit, WordPress, etc.
The contact form can be customized to have a variety of different fields, many of which sync to the client project. For example, if you request an “Event Date” (such as for a wedding), a client can fill this in and it’ll automatically populate it on your calendar as a tentative event.
Along with the fields, you can also customize the aesthetics of your form so it matches your website. You can customize fonts, colors, and more.
Tip #4: Understand your client projects
When you access a client project, you will be able to view your automation workflow, scheduled tasks, add team members, view the lead source, update the workflow stage, schedule calls, and create new files to share with your client. Each project has 4 main sections. Let’s talk about these!
Activity
The main hub for all of your email communications. You will be able to view all of your emails in a simple chain here.
Files
You will be able to view all sent, current, submitted and expired files here. For most photographers, this will include a proposal file (where you can view the contract and package details) and a questionnaire for collecting info from your clients.
Payments
Once you’re client has been sent an invoice, the payments and due dates will show here for easy reference. You will also be able to see the payment status when it’s been made or if it’s past due.
Details
This is a simple breakdown of the project including the date and initial inquiry info. You can also add private notes, which we sometimes utilize after having consult phone calls with a client.
Tip #5: Set up your Honeybook pipeline
To set up your Honeybook pipeline, go to Projects -> Customize. You can drag-and-drop pipeline queues around and add your own.
Tip #6: Set up questionnaires
For photographers who will want to send out questionnaires (something we definitely recommend!), such as an onboarding questionnaire or wedding questionnaire, you can create these as templates in Honeybook.
To do this, go to Templates -> Create New -> Questionnaire.
As a Smart File, you will be able to apply your brand settings (which we already set up earlier in this post) – so all of the fonts and color schemes are already in place. Now, you just simply add the question fields you want to collect info on. You’ll be done with this in no time!
Tip #7: Set up your call scheduler
Go to Tools -> Call Scheduling to begin.
We have several schedulers set up for our wedding photography businesses. We have one set up for phone calls, one for Zoom calls (which we set up with our current clients from time to time), and one we customized to allow clients to pick a date for their engagement sessions.
To set up a basic phone consult:
- Click + New Session Type
- Fill in the details
- Select session type from the dropdown (Phone Call, In Person, Video, Other)
- Title of Session
- Timezone
- Call duration
- When this session can be scheduled
- Session color
- Instructions
- Send invitee reminders
- Set availability
- Choose times you will be available to schedule phone calls
- Confirmation
- Update the confirmation message that is received by the client after they schedule with you
- Update the email preferences
- Send confirmation email
- Allow rescheduling
- Allow cancellations
Tip #8: Create an automation
Go to Tools -> Automation to begin.
Honeybook automations are about designing a logical sequence of events to ensure you are able to care for your clients needs.
You can automate the following:
- Sending of emails or files
- Triggering manual reminders to do something
As a part of our wedding photography workflow automation, we set up the following for our inquiries and follow ups:
- An automated email is sent once someone inquires with us
- The system then creates follow up email reminders (to be sent 2 days, 5 days, 10 days, 20 days, and 30 days after their initial inquiry). We check these manually and send them out if we do not hear from the inquiring couple.
You can make your workflows as simple or complex as you’d like.
Tip #9: Utilize your Tasks to stay on track
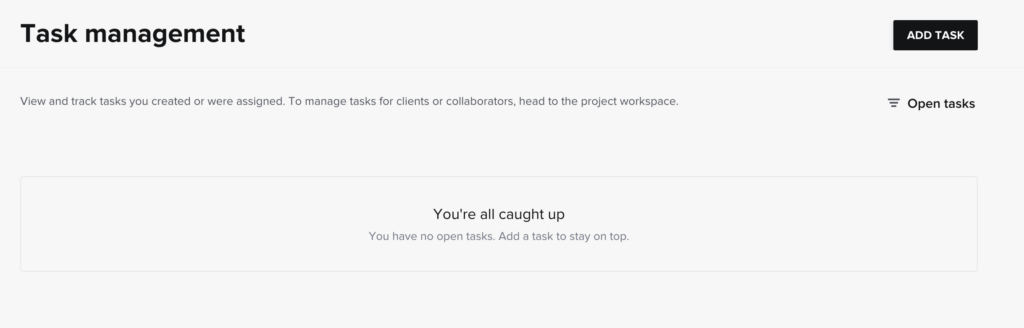
In the Tasks section, you will be able to view all of the manual tasks you set up in your workflows and their due dates.
This is a great area to check daily to ensure you are keeping up with all of your projects.
Tip #10: Get used to your calendar
Finally, getting in the habit of using your calendar will make you a better business person. Many elements on your calendar can auto-populate from inquiries (like wedding dates), while others can be added by hand (such as vacations, days off, individual sessions, and more).
Conclusion
In our experience, Honeybook is a great CRM for photographers of all types. It has been a lifesaver over the past decade running our wedding photography businesses, and we know it can be a great solution for you, too.
As a reminder, if you sign up using our link, you can receive 50% off your annual subscription to Honeybook along with a 30-day trial to test it out.

Honesty is a cornerstone of Shoot and Thrive, so we want you to know that some links in this post are affiliate links. This means we may earn a commission if you make a purchase—at no additional cost to you. We only recommend products and services we trust, have used ourselves, or have thoroughly researched based on industry feedback. Our goal is to provide solutions that genuinely help, whether they come from our direct experience or the collective knowledge of the photography community.
As photography business educators, we believe it's important for educators in this industry to be active photographers themselves. The images used throughout this website were taken through our photo studios - Hand and Arrow Photography and Marshall Scott Photography, except for stock images or if otherwise noted.

Turn Your Passion into a Thriving Business
Transform your photography business into a streamlined, profitable venture that gives you more time, freedom, and confidence.
With the Photography Business Academy, you’ll have a step-by-step guide to building the business—and life—you’ve always dreamed of. From branding to marketing, finances to client experience, we’ve got you covered.
